- App
- Make
- n8n
- MCP
How to convert HTML to an image
To turn HTML into an image, send the HTML or the URL of a web page to the 1001fx function html2image – from Make, n8n or the 1001fx app. It renders a PNG or JPEG, Tailwind classes work in the HTML, and placeholders such as {{ name }} are replaced with your data.
The fields
The same in the 1001fx app, Make, n8n and AI assistants. html2image costs 5 credits per item.
- html
- – Your HTML, with Tailwind classes if you like. Leave url empty.
- url
- – Alternatively a web page to capture. Fill either html or url.
- outputFormat
- – png or jpeg.
- width
- – Width of the image in pixels, for example 800.
- height
- – Height of the image in pixels, for example 600.
- replacements
- – Key and value pairs, for example key {{ name }} and the name from the previous step. In Make, map the values straight into the HTML instead: Make reads {{ … }} in text fields as its own mapping.
All parameters and examples: html2image reference.
Example
What you send to html2image and what comes back – the same in every tool.
HTML to PNG
Renders an HTML snippet (Tailwind classes work) as an 800×600 PNG.
Input
{
  "height": 600,
  "width": 800,
  "outputFormat": "png",
  "html": "<div class='flex flex-1 bg-gray-300 rounded-md'><div class='flex flex-col md:flex-row w-full py-12 px-4 md:items-center justify-between p-8'><h2 class='flex flex-col text-3xl sm:text-4xl font-bold tracking-tight text-gray-900 text-left'><span>Hello {{ name }}</span><span class='text-indigo-600'>Welcome to 1001fx</span></h2><div class='mt-8 flex md:mt-0'><div class='flex rounded-md '><div class='flex items-center justify-center rounded-md border-transparent bg-indigo-600 px-5 py-3 text-base font-medium text-white'>Get started</div></div><div class='ml-3 flex rounded-md '><div class='flex items-center justify-center rounded-md border-transparent bg-white px-5 py-3 text-base font-medium text-indigo-600'>Learn more</div></div></div></div></div>"
}Output · HTTP 200
{
  "statusCode": 200,
  "headers": {
    "content-type": "image/png"
  }
}Show curl command
curl -X POST 'https://api.1001fx.com/images/html2image' \
  -H 'X-API-KEY: YOURSECRETAPIKEY' \
  -H 'Content-Type: application/json' \
-d '{"height":600,"width":800,"outputFormat":"png","html":"<div class='\''flex flex-1 bg-gray-300 rounded-md'\''><div class='\''flex flex-col md:flex-row w-full py-12 px-4 md:items-center justify-between p-8'\''><h2 class='\''flex flex-col text-3xl sm:text-4xl font-bold tracking-tight text-gray-900 text-left'\''><span>Hello {{ name }}</span><span class='\''text-indigo-600'\''>Welcome to 1001fx</span></h2><div class='\''mt-8 flex md:mt-0'\''><div class='\''flex rounded-md '\''><div class='\''flex items-center justify-center rounded-md border-transparent bg-indigo-600 px-5 py-3 text-base font-medium text-white'\''>Get started</div></div><div class='\''ml-3 flex rounded-md '\''><div class='\''flex items-center justify-center rounded-md border-transparent bg-white px-5 py-3 text-base font-medium text-indigo-600'\''>Learn more</div></div></div></div></div>"}'In the 1001fx app
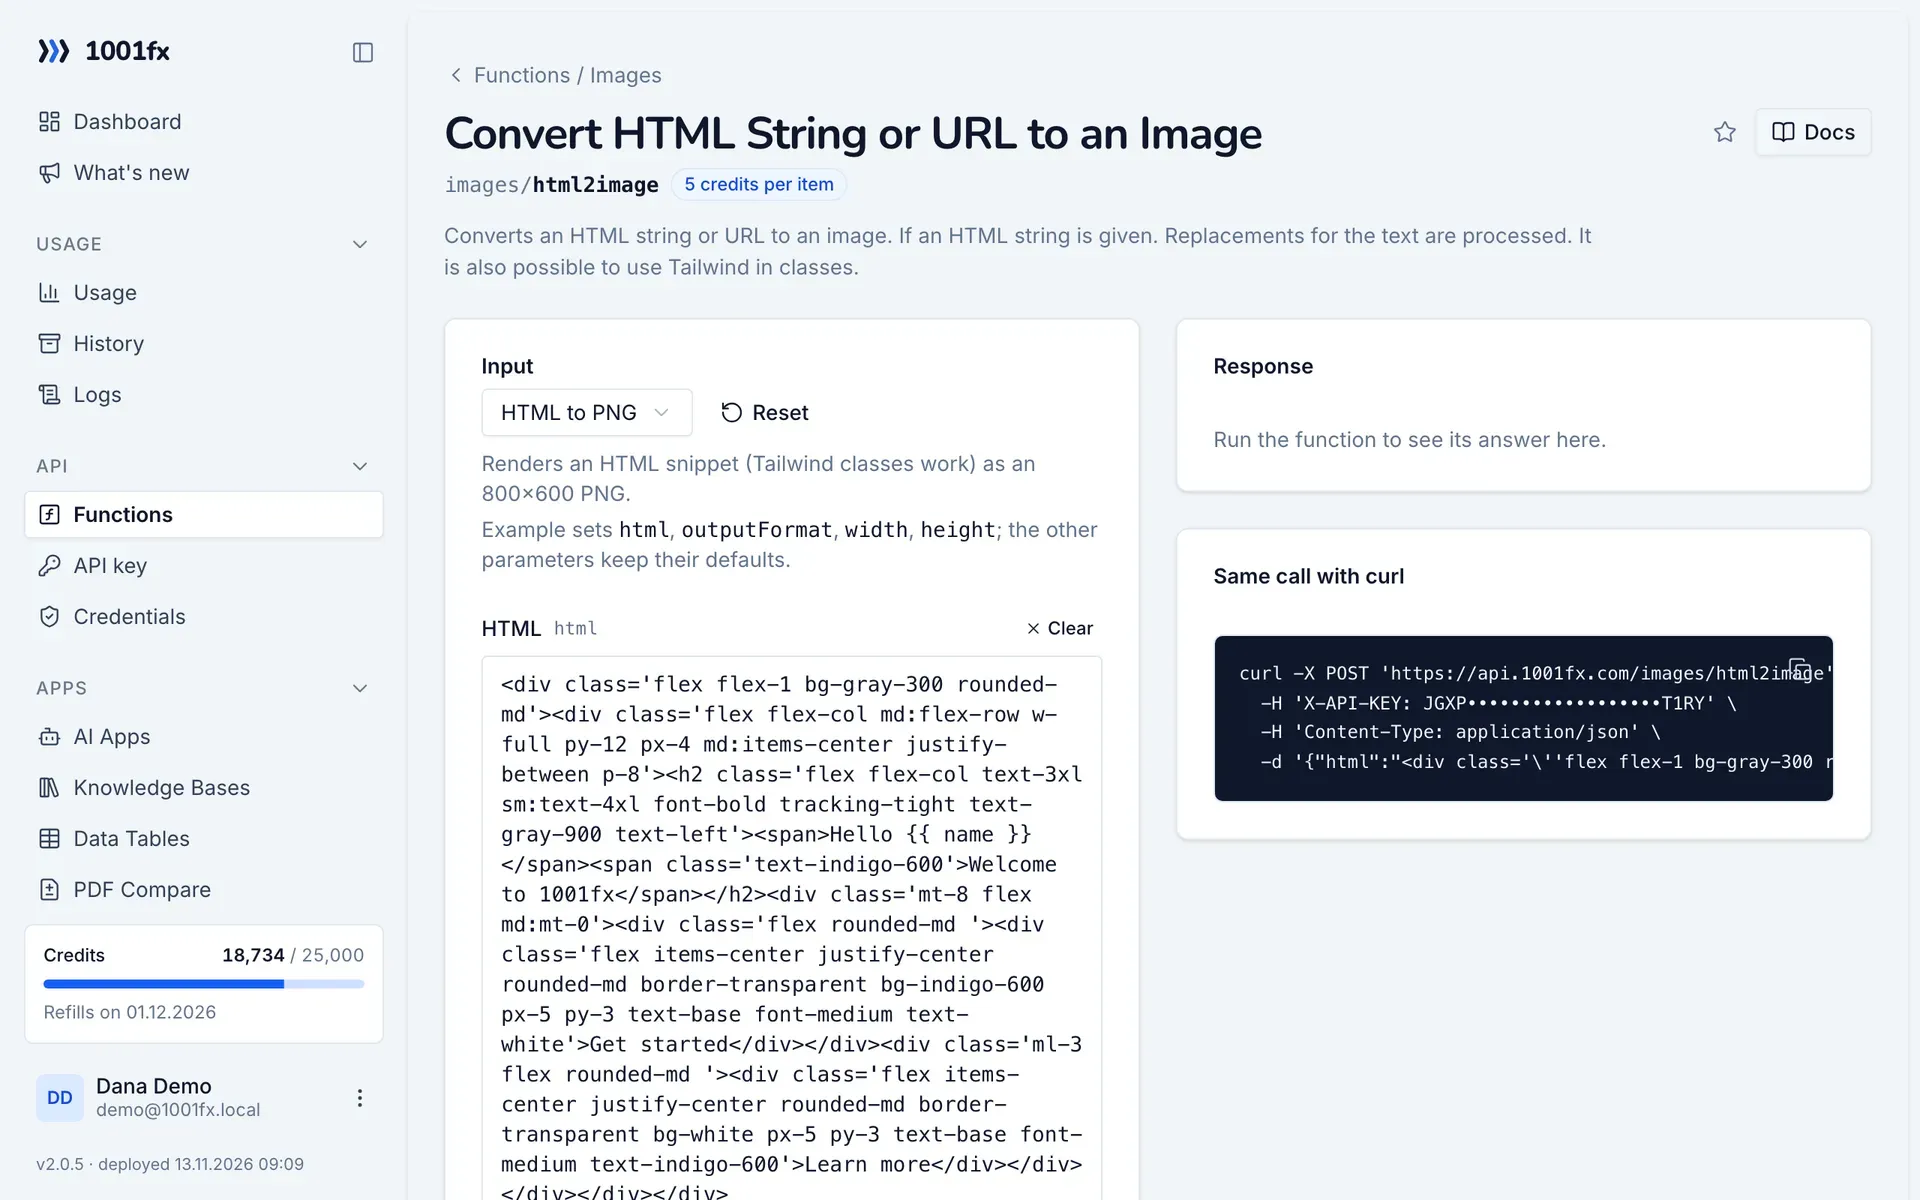
Without a scenario or workflow: run the function in your browser for a one-off task, or to try the fields before you build the automation.
- 1
Open the function
Log in to the 1001fx app and open Functions → Convert HTML String or URL to an Image.
- 2
Fill the fields
Fill the fields as described above. Files can be uploaded from your computer.
- 3
Run it
Click Run. The answer appears next to the form; files come as a download. Each run is charged like an API call.
- 4
Reuse the call
The same page shows the call as cURL command, ready for scripts and other tools.
In Make
- 1
Start the scenario
Start with the module that delivers the data, for example Google Sheets "Watch new rows" with the name and text for a certificate, badge or social post.
- 2
Add the 1001fx module
Add a module, search for 1001fx and pick “Convert HTML String or URL to an Image”. Select your 1001fx connection or create one with your API key.
- 3
Fill the fields
Fill the fields as described above, mapped from the previous steps.
- 4
Use the result
The module returns the image as a file. Upload it with Google Drive "Upload a file", attach it to an email or post it.
Connecting 1001fx: 1001fx for Make.
In n8n
- 1
Start the workflow
Start with the node that delivers the data, for example a Google Sheets Trigger with the name and text for a certificate, badge or social post.
- 2
Add the 1001fx node
Add a node, search for 1001fx and pick “Convert HTML String or URL to an Image”. Select your 1001fx credential or create one with your API key.
- 3
Fill the fields
Fill the fields as described above, mapped from the previous steps.
- 4
Use the result
The node returns the image as a file. Upload it with a Google Drive node, attach it to an email or post it.
Connecting 1001fx: 1001fx for n8n.
With an AI assistant (MCP)
Without building anything: connect your assistant to 1001fx once and ask for the result in your own words.
- 1
Connect your assistant
Add the 1001fx MCP server to Claude, Cursor or another MCP client and log in to 1001fx.
- 2
Ask for the result
Describe what you need and mention 1001fx, for example: "Use 1001fx to convert HTML to an image". The assistant finds images/html2image and fills its fields.
- 3
Get the answer
Pass files as links. File results come back as a temporary download link. Each run is charged like an API call.
Tips
- Keep the HTML in one place and fill it with replacements, so one design serves every row.
- Supported fonts: Alegreya, Barlow, Inter, Lato, Montserrat, OpenSans, Oswald, Poppins, PTSans, Raleway and Roboto.
- Set fullPage to true to capture a whole web page instead of the visible part.
Frequently asked questions
- What does a call cost?
- 5 credits per item.
- Can I use Tailwind?
- Yes. Tailwind classes in the HTML are applied when the image is rendered.